Radiant floor heating is often sold as the ultimate home comfort. I’ll admit, when I started my renovation, I was most excited about this one feature. I had visions of walking barefoot on a silently warm floor on a cold winter morning. No noisy vents, no dry, dusty air—just perfect, even warmth.
Then we moved in.
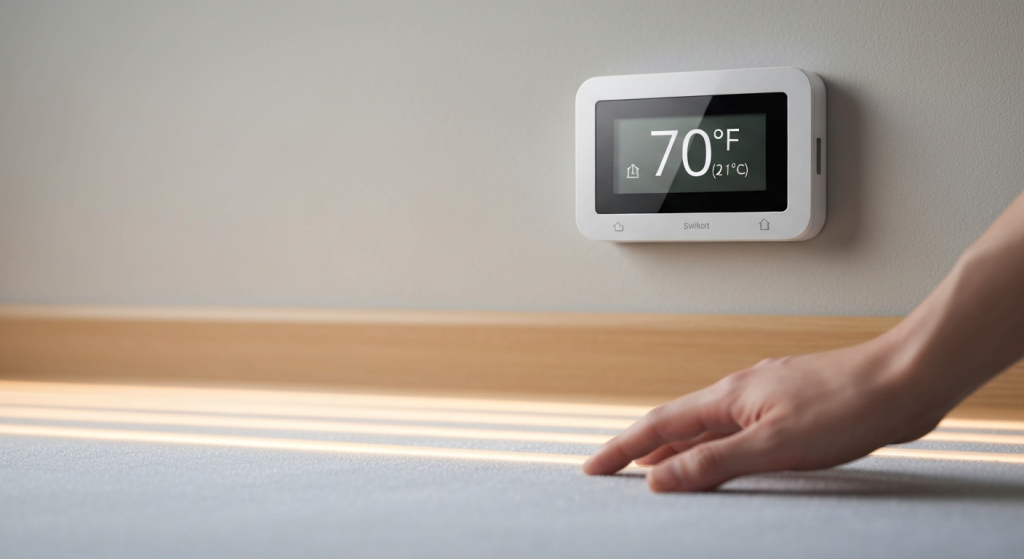
The reality was… messy. One part of the living room would be an oven, while the area by the window was still chilly. The system would run for hours, making the room uncomfortably hot, and then shut off for so long that the floors would become ice cold again. My brand-new, expensive smart thermostat insisted the room was 70°F ($21^\circ$C), but my feet were telling me a very different story. The dream was turning into a frustrating puzzle.
Here’s the thing I learned after a full season of testing: the problem wasn’t the heating system. It was the “smart” automation I was using. The rules I’d followed for placing my thermostat sensor, the same rules that work perfectly for a standard furnace, were completely wrong for radiant heat.
I’m Mahnoor Farooq, and for the past several years, my passion has been exploring the world of smart home automation. I love digging into how these systems work and how we can use them to make our homes genuinely more comfortable, not just more complicated. This article comes directly from my own hands-on experience during that renovation. I spent a whole winter trying to solve this heating puzzle, and what I found is something the generic smart home guides just don’t cover. My goal is to share what I learned so you can skip the frustration and get straight to the comfort you were promised.
The Big Mistake: Why Air-Based Rules Fail for Radiant Heat
Most thermostat instructions—especially for popular smart home brands—are written for forced-air systems. These systems (like furnaces or heat pumps) work by blowing hot air into a room. The air temperature changes very quickly. So, placing a thermostat sensor on an interior wall, about five feet off the ground, makes perfect sense. It measures the ambient air, and when it gets cold, it tells the furnace to send more hot air. Simple.
This is exactly what I did. I installed my new smart thermostat and placed its sensor right where the old one was. This was mistake #1.
Radiant heat is a completely different animal. It doesn’t heat the air directly. It heats a massive object—the concrete or wood subfloor—which then radiates that heat slowly and gently into the room, warming all the other objects (furniture, people) in it.
This system has two key traits:
- It’s slow. It can take an hour or more for the floor to warm up.
- It has high thermal mass. Once that floor is hot, it stays hot for a long time, even after the boiler or heating element shuts off.
My smart thermostat was completely baffled by this. It would sense the air was cold and tell the boiler to fire up. An hour later, the floor would finally get warm and start heating the room. The air sensor would eventually hit 70°F ($21^\circ$C) and shut the system down.
But the floor slab was still a massive, 85°F ($29^\circ$C) radiator. It kept pouring heat into the room for another hour, pushing the air temperature to 74°F ($23^\circ$C). This is called “overshoot,” and it was making us crazy. We’d be hot, then we’d be cold, and the thermostat was always lagging behind reality.
Air Temperature vs. Slab Temperature: What Really Matters?
This experience forced me to rethink what I was trying to control. Was I trying to control the air temperature or the floor temperature? The answer, I learned, is both, but in a specific order.
- Slab (Floor) Temperature: This is your heat source. Controlling this is the most important first step. If the floor is too hot, it can damage hardwood or laminate. If it’s not hot enough, it will never warm the room. This is your leading indicator.
- Air Temperature: This is your comfort level. It’s the end result of the heat radiating from the floor. This is your trailing indicator.
My air-only sensor was like trying to drive a car by only looking in the rearview mirror. It was only reacting to what had already happened, not what was about to happen. The key to taming radiant heat is to give your thermostat a way to see what the heat source (the slab) is doing.
My 5-Sensor Experiment: A Full Winter of Testing
I’m not one to give up easily. I was convinced there had to be a logical solution. So, I got a thermostat that could read multiple sensors and a few extra remote “puck” style sensors. I decided to spend the winter testing different placement strategies in my main living area to see what actually worked.
My goal was simple: find a placement that would give me a stable, comfortable room temperature without the wild hot-and-cold swings.
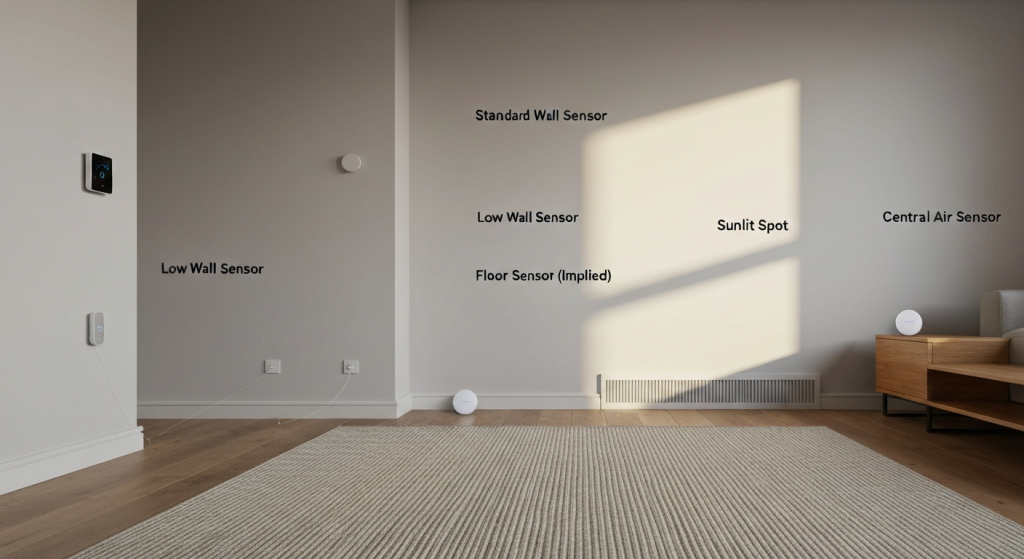
Strategy 1: The “Standard” Placement (The Failure)
This was my baseline test, the one that started the whole problem.
- Where: On an interior wall, about 5 feet (1.5m) up from the floor.
- Result: A complete failure. This location is too far from the heat source (the floor) to react quickly. It’s also easily fooled by drafts from the hallway or heat from the kitchen. This strategy produced the worst “lag and overshoot” and was the reason my family was constantly complaining.
Strategy 2: The “Sunlight” Spot
One day I noticed the thermostat shut off way too early. I realized the afternoon sun was hitting the wall it was on. This gave me an idea for what not to do.
- Where: An interior wall that received direct afternoon sunlight.
- Result: Even worse than Strategy 1. At 2 PM, the sun would hit the sensor, tricking it into thinking the room was 75°F ($24^\circ$C). It would shut the boiler off. By 5 PM, the sun was gone, the floor was cold, and the room would be freezing. It would then take until 8 PM for the system to catch up. This placement was actively working against us.
Strategy 3: Low on the Wall (The “Better” Air Sensor)
My next thought was to move the sensor closer to the heat source. If the heat is coming from the floor, the sensor should be near the floor, right?
- Where: On the same interior wall, but moved down to 18 inches (45cm) off the floor.
- Result: This was a huge improvement. Because it was closer to the floor, the sensor “felt” the radiant heat much sooner. It would tell the boiler to shut off before the slab got massively overheated. This dramatically reduced the temperature overshoot. It was still just an air sensor, so it could be fooled by a cold draft from under the door, but it was 90% better than the standard placement.
Strategy 4: The Floor Sensor (The “Source” Sensor)
During the renovation, we had the foresight to install a sensor wire in the floor itself. Most radiant heating installers will do this. It’s a small probe that gets embedded in the thin-set mortar under the tile or stapled just under the subfloor for wood.
- Where: A temperature probe embedded in the floor, wired directly to the thermostat.
- Result: This gave us perfect control of the floor. We could set the floor temperature to 82°F ($28^\circ$C), and it would never go over that. This is critical for protecting materials like engineered hardwood, which can be damaged by high heat.
- The Problem: It had no idea what the air temperature was. On a sunny spring day, the sun might warm the room to 72°F ($22^\circ$C) on its own. But the floor sensor would still heat the floor to 82°F ($28^\circ$C) because that was its only job, making the room feel stuffy and wasting energy.
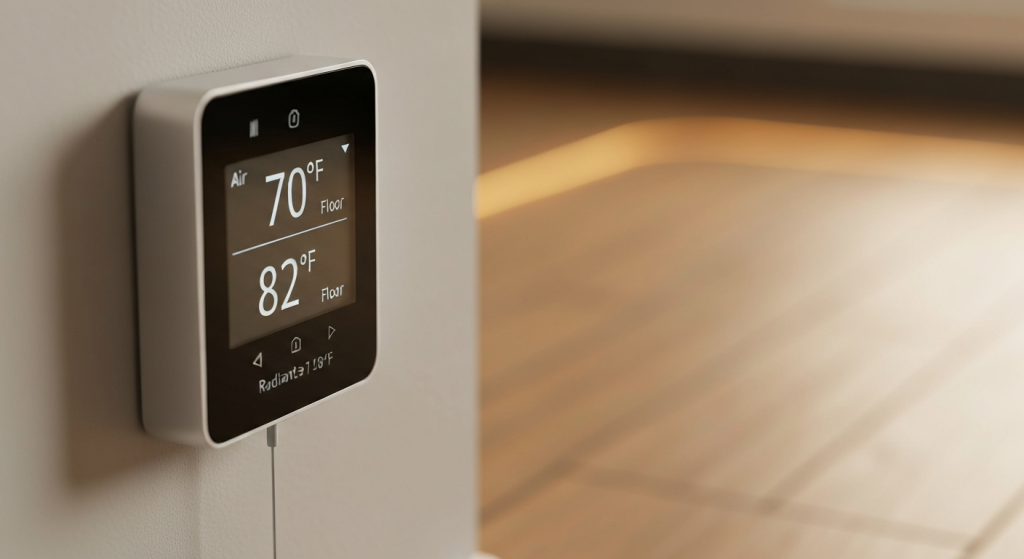
Strategy 5: The “Hybrid” Approach (The Winner)
This is where it all came together. My thermostat allowed me to use both the floor sensor and an air sensor at the same time.
- Where: Using the Floor Sensor (Strategy 4) as a primary limit and the Low Air Sensor (Strategy 3) as the comfort control.
- Result: This was the magic bullet. We configured the thermostat with two rules:
- Air Priority: Heat the room until the air sensor (placed 18 inches high) reads 70°F ($21^\circ$C).
- Floor Limit: Never let the floor sensor read above 84°F ($29^\circ$C).
This combination gave us everything. The air sensor managed our actual comfort level. The floor sensor acted as a “governor,” protecting the floor and, more importantly, preventing the slab from getting “super-charged,” which is the real cause of temperature overshoot. The heating became smooth, even, and incredibly comfortable.
My Test Results: Comparing Sensor Placement Strategies
After weeks of logging this, the data was pretty clear. This isn’t a formal lab study, just what I observed in my own home, but the difference was night and day.
| Sensor Placement Strategy | Comfort Level (1-10) | Temperature Stability | Energy Efficiency | My Key Takeaway |
| 1. Standard Wall (5 ft) | 3/10 | Very Poor (Wild swings) | Poor | The “default” is the worst choice for radiant. |
| 2. Sunlit Wall | 1/10 | Awful (Solar gain chaos) | Very Poor | A rookie mistake. Never place any sensor in direct sun. |
| 3. Low on Wall (18 in) | 7/10 | Good | Good | A decent “good enough” fix if you only have one air sensor. |
| 4. Floor Sensor Only | 8/10 (for floor) / 6/10 (for air) | Excellent (for slab) | Good | Protects the floor perfectly but can ignore air comfort. |
| 5. Hybrid (Floor + Low Air) | 10/10 | Excellent | Best | The clear winner. Total control and total comfort. |
How to Get it Right: Your Radiant Heating Sensor Plan
Based on my experience, here is my practical advice for anyone with radiant heat, whether you’re building new or trying to fix an existing system.
The Gold Standard: The Hybrid System
If you are renovating or building right now, this is the time to act.
- Insist on a Floor Sensor: Have your installer run a sensor wire from the thermostat location into the floor. The best spot is in the mortar, centered between two of the heating loops. This is a tiny, cheap part that makes a $10,000 system actually work.
- Buy the Right Thermostat: Do not buy a standard smart thermostat. You must get a thermostat that is “radiant-ready” or “UFH (Under Floor Heating) compatible.” This means it has a terminal to connect the floor sensor and can read an air sensor.
- Place Your Air Sensor Wisely: Even with the floor sensor, you still need an air sensor. Place it 12-18 inches off the floor on an interior wall that is free of drafts and sunlight.
The “Good Enough” Fix for Existing Systems
What if your floors are already sealed and you can’t add a floor sensor? You can still get 90% of the way there. The goal is to make your air sensor think more like a floor sensor.
- Move Your Sensor: Get that thermostat sensor off the wall at eye level.
- Go Low: Move it down to 12-18 inches from the floor. This helps it sense the heat from the slab much more quickly, cutting down on overshoot.
- Use Remote Sensors: If your smart thermostat (like an ecobee or Nest) has remote “puck” sensors, don’t put them on a dresser. Place one on a small stand, low to the ground, in the middle of the room (but out of foot traffic). Tell the thermostat to use that sensor as the primary one for the zone.
A Note on Smart Thermostats
Many popular smart thermostats are just plain dumb when it comes to the physics of radiant heat. They are designed for the fast-on, fast-off world of forced air.
If you’re shopping, look for thermostats that specifically mention “radiant,” “hydronic,” or “floor sensing.” These systems understand thermal mass and have different algorithms. Brands that specialize in hydronics, like tekmar, often have systems built for this. Their official guides on sensor placement are a great technical resource and confirm what I found in my own testing: placement is everything.
FAQs: Quick Answers on Radiant Heat Sensors
1. Can I use a Nest or ecobee thermostat with radiant floor heat?
Yes, but with a big “if.” You can use their air sensors, but you must place a remote sensor low to the ground (my Strategy 3) and tell the thermostat to use that sensor. They cannot, by default, connect to an in-floor sensor, so you lose the “Gold Standard” hybrid control and floor protection.
2. Where is the absolute worst place to put a thermostat sensor?
In direct sunlight. My test proved this. It will completely ruin your heating schedule. Other bad spots include near a drafty door, behind a curtain, or above another heat source (like a TV or lamp).
3. What’s the difference between a floor sensor and an air sensor?
A floor sensor (a probe) measures the actual temperature of the floor slab. It’s your heat source. An air sensor (in the thermostat or a remote puck) measures the ambient air temperature in the room. For radiant heat, the floor sensor controls the source, and the air sensor measures the result.
4. My radiant heat takes hours to warm up. Is it broken?
No, that’s normal. Radiant heat uses a large thermal mass (like a concrete slab), which takes a long time to heat up and cool down. This is why you don’t want to use a “smart” schedule that turns it down a lot at night. It’s better to set it to a comfortable temperature and let it maintain that temperature 24/7. It’s more efficient that way.
My Final Thoughts on Radiant Heat
That renovation project was a huge learning curve. It taught me that “smart” automation is only as smart as its setup. My expensive radiant system felt broken and uncomfortable for months, all because I trusted the generic, one-size-fits-all instructions.
Once I understood the physics—that I was heating a giant, slow-moving slab and not the air—the solution became clear. By moving my sensor and using a hybrid approach, I finally unlocked the comfort I’d been dreaming of. The system is now silent, perfectly even, and so comfortable that I forget it’s even there.
If your radiant heat is giving you trouble, don’t blame the system. Take a hard look at where you’re placing your sensors. A ten-minute fix might be all that stands between you and a perfectly warm floor.