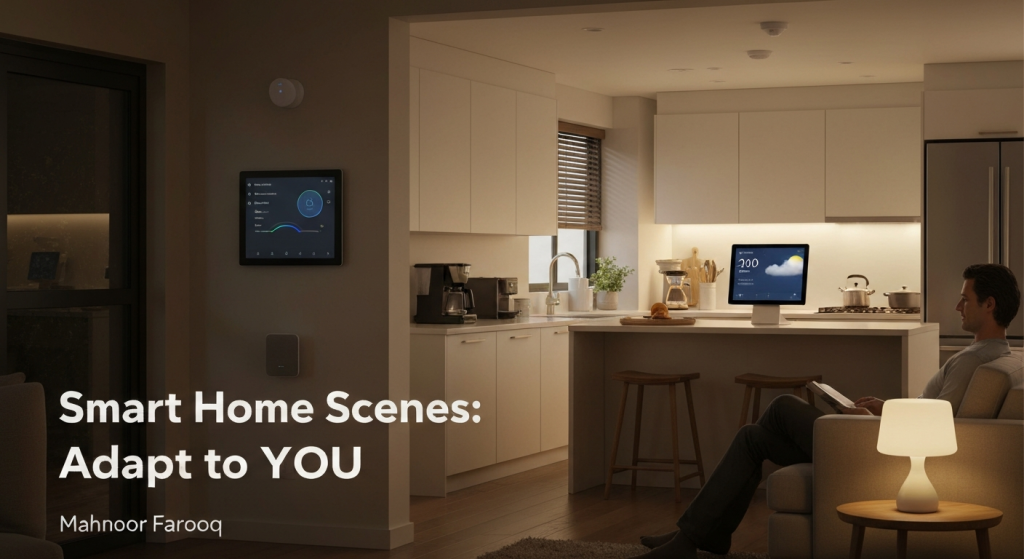
I used to have a “smart” home that I had to boss around all day. “Hey, turn on the lights.” “Hey, set the ‘Focus’ scene.” I tapped buttons in an app to turn on music. It was smart, but it wasn’t wise. It didn’t know the most important thing: whether I was even in the room. This led to lights blazing in empty rooms or, worse, my home office plunging into darkness while I was sitting perfectly still, reading. The real dream isn’t a controlled home; it’s a reactive home. A home that anticipates your needs without you saying a word.
Hi, I’m Mahnoor Farooq. I’ve spent the past five years working with and exploring smart home automation. My passion is figuring out how to make these gadgets move beyond being simple remotes and become truly helpful partners. I love digging into the “why” behind the tech, testing different setups, and sharing what I learn with readers. The ultimate goal for me is a hands-free experience, and I’ve learned that the secret isn’t just one magic sensor—it’s about making them work together.
The key to this hands-free world is adaptive occupancy scenes. This means the home doesn’t just know a motion happened; it knows a person is present. When you walk into the kitchen in the morning, the lights fade on to a soft white, and the morning news briefing starts. When you sit on the sofa after 8 PM, the main lights dim, and the accent lamps turn on. And when everyone leaves the room, the home intelligently turns everything off, saving energy. No apps. No voice commands. This is the goal. And after a lot of testing, I’ve finally cracked the code for real, messy, lived-in homes.
What Are Adaptive Occupancy Scenes (And Why Is It So Hard)?
A “scene” is just a preset group of commands. A “Movie” scene might dim the lights, turn on the TV, and set the soundbar. Most people trigger these with their voice or an app. An adaptive occupancy scene triggers automatically based on your presence.
This sounds simple. Just buy a motion sensor, right? That’s what I thought, too.
The core problem is the difference between motion and presence.
- Motion is easy. A person walks by. A cat runs down the hall. The sensor sees it.
- Presence is hard. It’s a person sitting still reading a book. It’s you standing at the kitchen counter chopping vegetables. It’s you working at your desk, where your only movements are typing and breathing.
Most basic “motion sensors” are just not built for presence. They have a simple timer. If they don’t see a large movement for five minutes, they decide the room is empty. This leads to the single most annoying smart home failure: the lights turning off while you are still in the room. This is the “false negative,” and it’s the problem I set out to solve.
The Tools for the Job: Understanding Occupancy Sensors
To build a reliable system, we first need to understand our tools. Not all sensors are created equal. After working in this space, I’ve found that most of what we need comes down to two main types: PIR and mmWave.
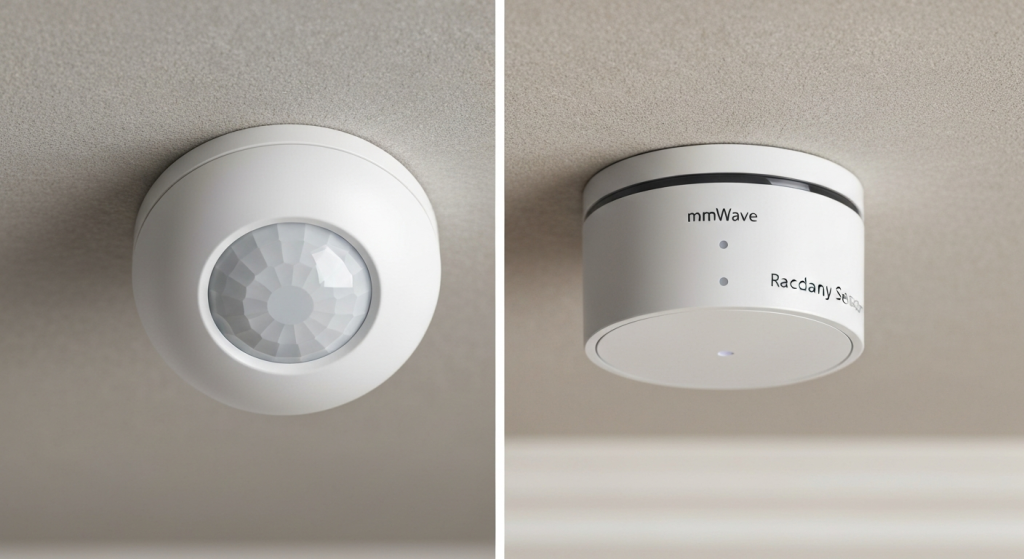
The Classic: PIR (Passive Infrared) Sensors
This is what most people think of as a “motion sensor.” A PIR sensor works by detecting changes in infrared energy—or, more simply, heat in motion. When your warm body moves across its field of vision, it triggers.
- Pros: They are cheap, widely available, and usually have great battery life.
- Cons: They are terrible at detecting presence. As researchers have noted, a major limitation is their inability to detect stationary objects or micro-movements (Sithravel et al., 2023). If you sit still to read or watch TV, you become invisible to the sensor, and it will eventually decide you’ve left.
The New Standard: mmWave (Millimeter Wave) Radar
This technology is the game-changer for occupancy. An mmWave sensor works like a tiny radar system. It sends out small signals that bounce off objects. It’s sensitive enough to detect fine movements like the rise and fall of your chest as you breathe or your fingers moving on a keyboard.
- Pros: They are incredibly accurate at detecting sedentary (non-moving) occupants, which traditional PIR sensors miss (Droitcour et al., 2024). This makes them perfect for offices, living rooms, and bedrooms.
- Cons: They can be more expensive. They also can sometimes be too sensitive, picking up motion from ceiling fans or curtains moving in a breeze, though this can be tuned.
The Real Solution: Sensor Fusion
After all my testing, here’s the truth: neither sensor is perfect on its own. The ultimate solution is using them together. This approach is often called “sensor fusion,” which just means combining the data from multiple sensors to get a much more accurate picture of the room (Huang et al., 2022).
By combining different types, we can cover all our bases. We use a PIR sensor for its instant “on” trigger when you enter, and an mmWave sensor to confirm “presence” so the lights don’t turn off.
Here’s a quick comparison based on my findings:
| Feature | PIR (Passive Infrared) Sensor | mmWave (Radar) Sensor |
| Detects What? | Large movements (walking) | Fine movements (breathing, typing) |
| Best For | Entryways, hallways, quick “on” triggers | Rooms where you are still (office, living room) |
| Common Failure | Turns off when you sit still (False Negative) | Can be triggered by fans (False Positive) |
| My Take | Great for “Hello!” | Great for “Are you still there?” |
My 3 Real-World Occupancy Layout Tests
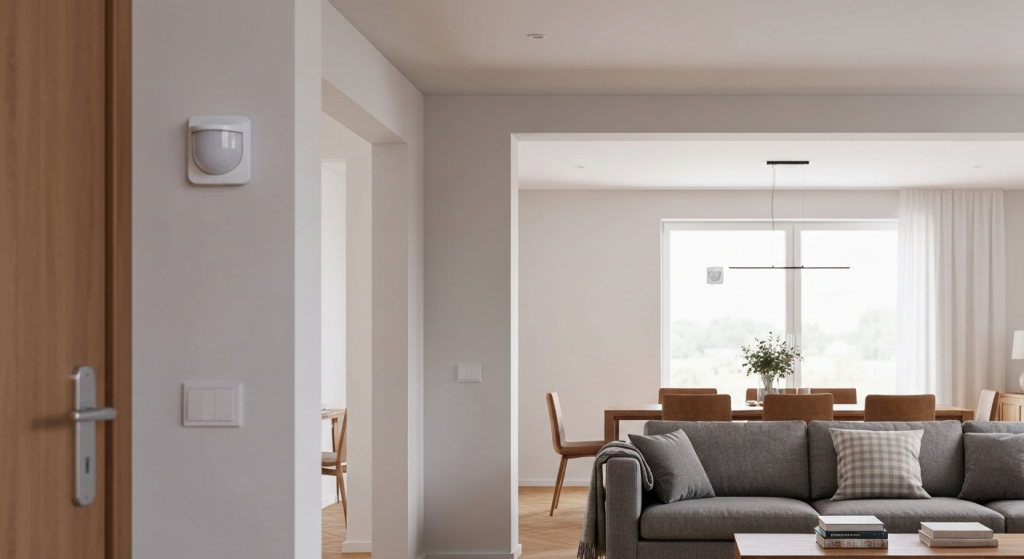
My home is not a perfect rectangle. It has an L-shaped living/dining room, a small home office, and hallways that bleed into other rooms. A “one-size-fits-all” setup was never going to work. Here’s the journey I went on, from total failure to a system that finally works.
Layout 1: The “One Sensor to Rule Them All” Failure
My first attempt was what most people try. I bought a single, battery-powered PIR sensor and stuck it on the wall of my L-shaped living room.
- What I Did: Placed one PIR sensor near the TV, pointing at the sofa.
- The Result: It was a complete bust.
- False Negatives: If I sat on the sofa reading, the lights would shut off after 10 minutes. I had to wave my arm in the air like a fool to turn them back on.
- Blind Spots: The “L” shape meant the sensor couldn’t see the dining area at all. I could be eating dinner in total darkness while the sensor thought the room was empty.
- False Positives: My cat, walking home from his afternoon nap, would trigger the “Welcome Home” scene, blasting the lights and music.
- My Verdict: This setup is cheap, but it’s more annoying than it is helpful. It completely fails the “presence” test.
Layout 2: The “Multi-PIR” Approach (Better, But Flawed)
My next idea was to use more sensors. If one sensor has blind spots, two should be better, right?
- What I Did: I placed two PIR sensors. One covered the living room seating area, and the other covered the dining area. I set the automation logic to “If either sensor detects motion, keep the lights on.”
- The Result: This was a big improvement for coverage. I could move between the two zones without the lights turning off. But the core problem remained. If my partner and I sat at the dining table talking for 15 minutes, or I sat on the sofa watching a movie, we still weren’t moving enough. The sensors would eventually time out, and we were back to waving our arms.
- My Verdict: Better, but it only solved the blind spot problem. It did not solve the “stillness” problem. It was still a motion-based system, not a presence-based one.
Layout 3: The “Hybrid” Solution (The Winner)
This is where I finally got it right. I stopped thinking about motion and started thinking about zones and presence. I used the “sensor fusion” concept.
- What I Did: I combined sensor types based on what each room is for.
- In the Home Office: This is a simple, rectangular room where I am “present” but “still” for hours. I used one mmWave sensor mounted on the ceiling. That’s it. It detects me at the desk, even if I’m just breathing. I can work for four hours straight, and the lights never turn off. When I leave, it detects the room is empty and turns them off. It’s perfect.
- In the L-Shaped Living/Dining Room: This was trickier. I used a hybrid “sensor fusion” approach.
- One PIR Sensor at the main entryway. This is my “instant on” trigger. It’s fast and reliable for the moment someone walks in.
- One mmWave Sensor covering the main sofa and seating area. This is my “presence” sensor. It’s aimed to detect us sitting on the couch.
- The Automation Logic: This is the secret. My smart home hub now runs this logic:
- To Turn ON:
WHEN PIR-Entry detects motion, THEN run 'Welcome' Scene.(This is instant). - To Keep ON:
WHEN 'Welcome' Scene is on, DO NOT turn off IF mmWave-Sofa detects presence. - To Turn OFF:
WHEN PIR-Entry has been clear for 5 minutes AND mmWave-Sofa has been clear for 5 minutes, THEN run 'Goodbye' Scene.
- To Turn ON:
- My Verdict: This is the solution. The PIR sensor gives me the fast-acting trigger I want, while the mmWave sensor acts as the “truth” for whether a person is still in the room. The lights never turn off on me, they never turn on for the cat, and the dining room blind spot is no longer an issue because the system waits for all sensors to be clear.
How to Build the Automation Logic (No App-Tapping)
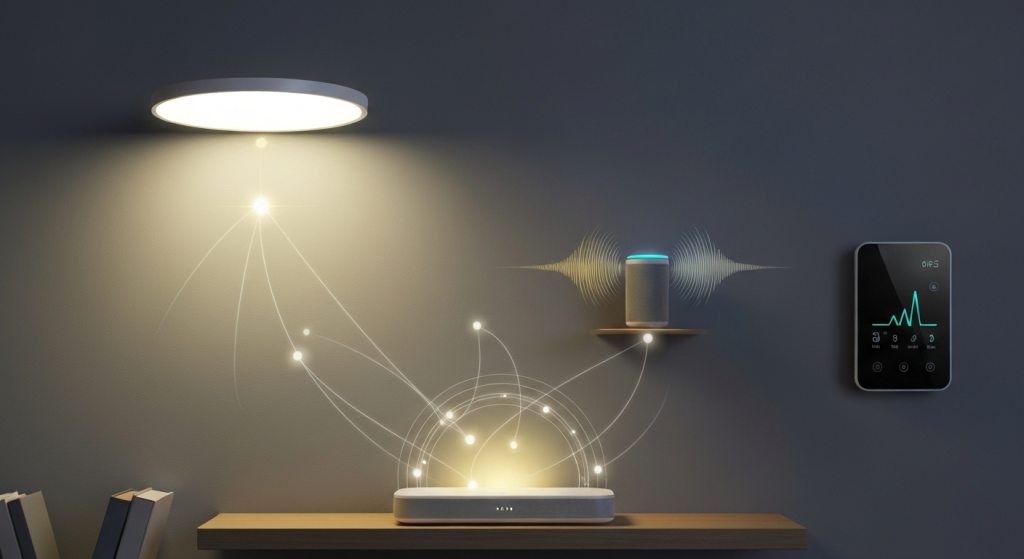
The sensors are just the eyes. The “scene” is the action. The automation is the brain that connects them. You don’t need to be a coder, but you do need to think in “When-If-Then” logic. Most smart home platforms (like Home Assistant, SmartThings, or even Alexa Routines) use this.
The “When”: Your Trigger
This is the event that starts the automation. For us, the simplest trigger is:
WHEN Kitchen Occupancy Sensor detects presenceWHEN Hallway PIR Sensor detects motion
The “If”: Your Conditions (The Secret Sauce)
This is what makes the automation truly smart. The “If” step checks other things before it runs. This stops your home from doing dumb things.
- Time of Day:
IF it is after sunset...(So the lights don’t turn on in the middle of the day). - Other Devices:
IF the TV is already on...(Don’t run the “Welcome” scene, run the “Movie” scene instead). - Location:
IF I am home...(Don’t run the “Welcome” scene if I’m just the dog walker stopping by).
My favorite logic combines the “When” and “If” for a “Welcome Home” scene:
- WHEN the
Front Door Contact Sensoropens… - AND IF
my phonehas just connected to the Wi-Fi… - AND IF it is
after sunset… - THEN run the
Welcome Homescene (entry light on 50%, living room lamps on, music plays).
The “Then”: Your Scene
This is the fun part. This is the list of actions you want to happen. A single occupancy trigger can do more than just control a light.
- Kitchen Morning Scene (When: 6 AM – 9 AM):
Turn on Ceiling Lights to 80% (Cool White)Turn on Under-Cabinet Lights to 50%Play 'Morning News' on the speaker
- Living Room Evening Scene (When: 8 PM – 11 PM):
Turn off Ceiling LightsSet Accent Lamps to 40% (Warm White)Set TV Backlight to 'Blue'Turn off 'Goodbye' scene
- “Empty Home” Scene (When: All sensors clear for 10 minutes):
Turn off all lightsTurn off all musicSet Thermostat to 'Eco' mode
Solving Common Headaches: Troubleshooting Your Setup
During my five years of testing, I’ve run into almost every problem imaginable. Here are the most common ones and my personal fixes.
Problem: My Lights Turn Off While I’m Reading!
This is the classic “false negative.”
- My Fix: You are almost certainly using only a PIR sensor. Your sensor doesn’t see you. You have two choices:
- The Bad Fix: Make the “timeout” longer (e.g., 30 minutes). This works, but it means your lights stay on for 30 minutes after you leave, wasting energy.
- The Good Fix: Add a mmWave sensor. Place it in the room you use for stationary activities. This will detect your presence and tell the PIR sensor’s timer to “wait.”
Problem: My Pets Keep Triggering the Lights!
This is the “false positive.”
- My Fix: This is a PIR sensor issue. They see the heat from your pet.
- Lower Sensitivity: Many PIR sensors have a small switch or dial inside to make them “less” sensitive. This is often labeled “pet immunity.”
- Change Placement: I’ve had success mounting the sensor higher on the wall (7-8 feet) and pointing it slightly down. This creates a detection zone that covers a human walking in but misses the pet on the floor.
- Use mmWave: Most mmWave sensors can be “tuned” to ignore small movements or pets, making them a better, if more expensive, solution.
Problem: The Sensor in the Hallway Triggers the Living Room!
This is what I call “sensor bleed.” Your sensor’s cone of vision is wider than you think, and it’s “seeing” motion through the doorway of another room.
- My Fix: You have to physically block the sensor’s view. This feels silly, but it works. I have literally put a small piece of electrical tape on the side of a PIR sensor’s plastic dome to narrow its field of view. This “blinds” it to the hallway, so it only triggers when someone is actually in the room.
FAQs: Your Occupancy Questions Answered
- What’s the difference between an occupancy sensor and a motion sensor?Think of it as motion vs. presence. A “motion sensor” (usually PIR) only detects movement. An “occupancy sensor” (usually mmWave or a hybrid) can detect a stationary person. For a truly smart home, you want occupancy.
- Do occupancy sensors use a lot of electricity?No. They use a tiny amount of power. The energy they save by turning off lights and HVAC in empty rooms far outweighs their own low consumption.
- Can mmWave sensors see through walls?It depends on the sensor and the wall. Most consumer-grade mmWave sensors are designed not to see through standard drywall, but they might “bleed” through a very thin partition or door. This is why placement and tuning are important.
- Do I need a smart home hub for this to work?To get the “hybrid” (Layout 3) logic, yes, you almost certainly do. A central hub (like Home Assistant, Hubitat, or SmartThings) is the “brain” that can receive signals from two different sensors and make a smart decision. Simple Wi-Fi sensors that only talk to their own app usually can’t do this.
The True “Hands-Off” Home Is Worth the Effort
Setting up a truly adaptive home takes more effort than screwing in a smart bulb. It took me three layouts and a lot of testing to get it right. You have to learn the quirks of your own space—the L-shaped rooms, the pets, the way the light hits the wall.
But the payoff is huge. The goal is to make the technology disappear. It’s when you walk through your home for a week and realize you haven’t touched a light switch or barked a voice command once. The house just knew you were there. It felt natural, saved energy, and let me focus on living, not managing. That’s not just smart; it’s wise.