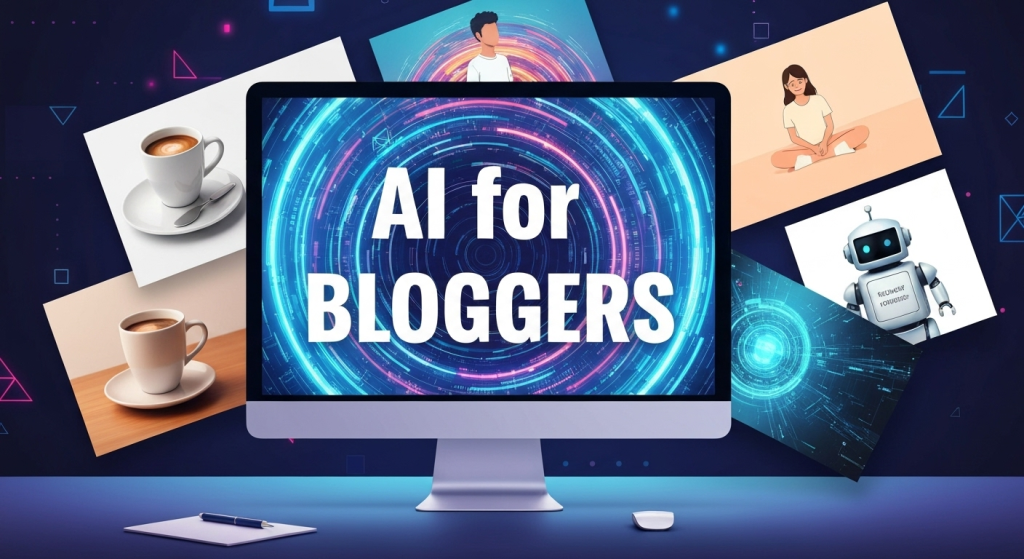
Finding the right visuals for a blog post can feel like a chore. For years, we’ve hunted through the same stock photo websites, seeing the same generic images of smiling people in boardrooms. They’re clean, but they have no personality. And they certainly don’t match the unique ideas in our articles. AI image generation changes all of that. It promises custom, unique graphics in seconds. But with so many free tools popping up, which ones are actually good for bloggers? Which ones are fast, easy to use, and (most importantly) understand what you’re asking for?
I decided to find out. I’m not just talking about features on a webpage; I mean real, hands-on testing for the graphics a small creator actually needs. This isn’t about creating wild fantasy art. It’s about getting a simple, high-quality featured image, a clear in-post illustration, or a graphic with text that doesn’t look like a garbled mess.
My name is Mahnoor Farooq. For years, I’ve been exploring and writing about creative AI tools, watching them grow from simple novelties to powerful assistants. My work involves digging into what these tools can do, sharing my experiments, and explaining the cultural and technical shifts they bring in a way that’s easy to understand. I’m not a high-level developer, but I am a passionate creator, just like you. My curiosity is about what’s practical, what works, and what can genuinely help us make better content.
After working in this creative space for over five years, I’ve seen firsthand how the right visual can stop a reader from scrolling. It builds trust and makes your content more engaging. But hiring a designer for every post is not realistic for most of us. AI is the tool that levels the playing field. So, I spent the last few weeks putting five of the most popular free generators to the test to see which one truly deserves a spot in a blogger’s toolkit.
Why Even Bother with AI-Generated Images for Blogging?

Let’s be honest: “free stock photos” are never truly free. You pay with your blog’s uniqueness. The moment you use that all-too-common photo of a woman laughing at a salad, you blend in. AI-generated images offer three huge advantages for bloggers and small creators:
- Total Uniqueness: The image you create for your post on “10 Tips for Better Time Management” will be the only one like it on the internet. It directly matches your content, your style, and your vision.
- Cost-Effectiveness: This is the big one. These tools have generous free tiers. You can create dozens of high-quality images for featured posts, social media, and in-post examples without spending a dime.
- Speed and Specificity: Need an image of “a person feeling overwhelmed by emails, in a minimalist vector style”? You can’t find that on a stock site. With AI, you can generate that exact concept in about 30 seconds.
This isn’t just about replacing stock photos. It’s about creating visuals that were impossible for a solo creator to make before. It’s about finally having the graphics match the quality of your writing.
My Testing Method: A Fair Fight for Blog Graphics
To make this a fair comparison, I couldn’t just ask each tool to “make something cool.” I needed to test them on tasks that bloggers face every day. I chose five top-tier generators known for their powerful free plans.
The 5 Contenders:
- Microsoft Designer (DALL-E 3): The powerhouse, using one of the most advanced models (DALL-E 3) for free.
- Leonardo.Ai: The artist’s choice, known for multiple models and fine-grained control.
- Ideogram: The text specialist, famous for its ability to (mostly) get words right.
- Adobe Firefly: The “safe” choice, trained on licensed content and integrated into the Adobe ecosystem.
- Canva Magic Media: The convenient choice, built right into the tool most bloggers already use.
The 4 Test Prompts:
I used the same four prompts for each tool to judge their strengths and weaknesses.
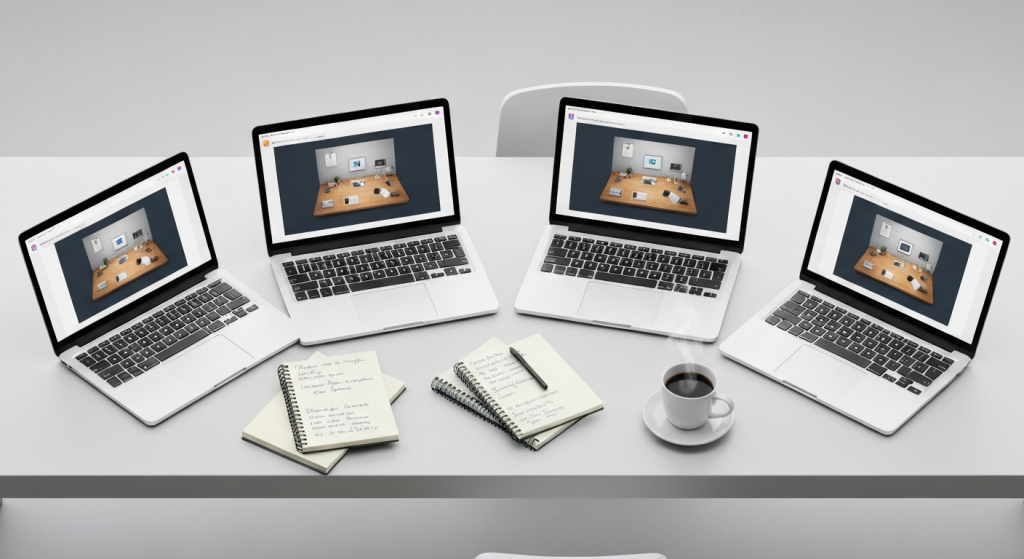
- The Featured Image Prompt: “A high-quality, vibrant flat-lay photo of a wooden desk with a laptop, a steaming coffee mug, a notebook, and a small succulent plant. Soft, natural lighting. Photorealistic style.”
- Why? This tests photorealism, composition, and lighting—perfect for a hero image.
- The In-Post Illustration Prompt: “A simple, minimalist vector illustration of a person feeling overwhelmed by emails. Use a limited color palette (blues and oranges). Clean lines.”
- Why? This tests the ability to follow artistic style instructions and convey a specific concept.
- The Text-on-Image Prompt: “A cute, illustrated robot holding a sign that says ‘AI for Bloggers’. The text must be clear and spelled correctly.”
- Why? This is the ultimate test. Most AI generators fail horribly at text.
- The “Chaos Test” Prompt: “A watercolor painting of a red fox wearing a tiny astronaut helmet, sitting on the moon and looking at Earth.”
- Why? This tests creativity and prompt adherence. Can it combine multiple, weird ideas correctly?
My Grading Criteria:
- Visual Quality: Does it look polished and professional, or like a messy AI smudge?
- Prompt Following: Did it actually do what I asked? Is the coffee mug steaming? Is the text spelled right?
- Speed: How long did it take from prompt to finished image?
- Blog-Readiness: How much editing would I need to do before I could put this on my site?
The 5 Free AI Generators: Head-to-Head Comparison
Here’s the detailed breakdown of how each tool performed.
1. Microsoft Designer (Powered by DALL-E 3)
Microsoft Designer (which you can also access via Bing Chat/Copilot) is my baseline for top-tier generation. It’s free and uses DALL-E 3, which is incredible at understanding natural language.
The Results:
- Prompt 1 (Desk Photo): Stunning. This was the most realistic of the bunch. The wood grain on the desk was detailed, the laptop screen had a believable (though generic) glow, and the steam from the coffee mug was delicate and looked real. It was 100% blog-ready.
- Prompt 2 (Email Illustration): Perfect. It immediately understood “minimalist vector” and “overwhelmed.” The image showed a stylized person with hands on their head, buried in a pile of email icons. The blue and orange color palette was spot-on.
- Prompt 3 (Text Robot): Nailed it on the first try. The robot was cute, the sign was clear, and the text “AI for Bloggers” was spelled perfectly. Its ability to integrate text is a game-changer.
- Prompt 4 (Fox on Moon): Beautiful. It created a charming watercolor. The fox was there, the helmet was on, it was sitting on the moon, and Earth was in the background. It followed every single instruction.
My Take:
Microsoft Designer is the best all-rounder, hands down. Its greatest strength is its “listening” ability. You can write a long, descriptive prompt, and it will understand the relationships between objects. For bloggers who need a specific, complex scene, this is the tool to start with. It’s fast (using free “boosts” for priority generation) and the quality is top-notch.
| Pros | Cons |
| Incredible prompt understanding (DALL-E 3). | Fewer “artistic style” models to choose from. |
| Excellent at photorealism and illustrations. | Integrated into a larger “Designer” app, which can be fussy. |
| One of the best at generating accurate text. | Images are always 1:1 square, requiring a crop later. |
| Completely free and generous. |
2. Leonardo.Ai
Leonardo.Ai feels like it was built for artists and creators. The free plan gives you 150 daily “tokens,” which is enough for dozens of images. Its main feature is the ability to choose from many different “models,” including its own, plus community-trained styles.
The Results:
- Prompt 1 (Desk Photo): Very high quality, but with a catch. Its default models (like “Leonardo Diffusion”) created a more cinematic, artistic version of the desk. It looked cool, but not “photorealistic.” I had to switch to the “Absolute Reality” model to get a result that looked like a real photo.
- Prompt 2 (Email Illustration): Good, but required model-hopping. The default models created a 3D, overly-rendered character. I had to use a “vector” model from the community to get the simple, clean lines I wanted.
- Prompt 3 (Text Robot): A clear failure. This is Leonardo’s weakness. I got “AI fr Bleggrs,” “AII fr Boggers,” and other messes. The text was part of the art, not a clear label. It was unusable for this task.
- Prompt 4 (Fox on Moon): Absolutely gorgeous. This is where Leonardo shines. The watercolor was rich, the fox was stylized beautifully, and the lighting was dramatic. It was less of a literal interpretation and more of an artistic one.
My Take:
Leonardo is my go-to when I want a specific vibe. If I need a “cyberpunk” style or a “fantasy oil painting” style, its models are unbeatable. But for a simple blog graphic, it’s often overkill and its text generation is poor. It’s a tool for when you want art, not just an illustration. The learning curve is steeper, but the control is powerful.
| Pros | Cons |
| Huge library of fine-tuned models for specific styles. | Terrible at generating text. |
| Excellent for artistic and cinematic images. | Steeper learning curve; requires “token management.” |
| Generous free daily token allowance. | Default models aren’t great for simple photorealism. |
| Lots of control (image-to-image, negative prompts). |
3. Ideogram
Ideogram launched with one major promise: it can actually write text. For bloggers who want to make title cards, quotes, or branded images, this is a massive claim.
The Results:
- Prompt 1 (Desk Photo): Good, but not great. The images were a bit “plasticky” and soft. They looked more like high-end 3D renders than photos. It understood all the elements, but the quality wasn’t on par with Designer or Firefly.
- Prompt 2 (Email Illustration): Decent. It followed the vector instruction well, but the compositions were often a bit strange or cluttered. It took a few re-rolls to get a clean, usable image.
- Prompt 3 (Text Robot): Flawless. This is its superpower. Not only did it spell “AI for Bloggers” correctly every single time, but its “Magic Prompt” feature offered variations: “a vintage robot,” “a modern 3D robot,” “a simple icon robot.” It understood that the text was the most important part of the prompt.
- Prompt 4 (Fox on Moon): Surprisingly creative. While the watercolor style wasn’t as authentic as Leonardo’s, it handled the combination of concepts (fox, helmet, moon, Earth) very well.
My Take:
Ideogram is a specialist tool, and it’s brilliant at what it does. If your graphic’s main purpose is to convey words, I go here first. I no longer have to generate an image and then spend 10 minutes in Canva trying to find a font that fits. It’s not the best all-rounder for pure photography or art, but it solves the single biggest frustration for creators.
| Pros | Cons |
| The best-in-class for generating clear, accurate text. | Photorealism is weak; images can look plasticky. |
| “Magic Prompt” feature is great for brainstorming. | Fewer style controls than Leonardo. |
| Very fast and simple to use. | Overall image quality is a step below the top tier. |
| Free tier is very generous. |
4. Adobe Firefly
Adobe Firefly is the “corporate” choice, and I mean that in a good way. Its defining feature is that it was trained only on Adobe Stock’s licensed library and public domain content. This makes it the safest choice for commercial use.
The Results:
- Prompt 1 (Desk Photo): Excellent. It looked exactly like a high-end, clean, professional stock photo. The lighting was perfect, the composition was balanced, and it was 100% “safe” and polished. This is perfect for a more professional or corporate blog.
- Prompt 2 (Email Illustration): Very strong. Firefly has a “Content Type” setting, so I could just select “Vector.” It produced an image that was clean, scalable, and perfectly matched the prompt.
- Prompt 3 (Text Robot): Total failure. Firefly is notoriously bad at text and seems to actively avoid it. It produced a robot holding a blank, garbled, or empty sign every time.
- Prompt 4 (Fox on Moon): Good, but “safe.” The results were less whimsical than the other tools. It created a very literal, clean image of the fox, but it lacked the artistic flair of Leonardo or the creativity of Designer.
My Take:
Adobe Firefly is my “trust” tool. When I am writing for a client or need a featured image that is guaranteed to be clean and commercially safe, Firefly is the answer. The peace of mind that comes from its ethical training data is a huge asset. As Adobe explains, its models are designed to be commercially safe, which is a major concern for any serious blogger. You can find more on their approach here: https://helpx.adobe.com/firefly/web/get-started/learn-the-basics/adobe-firefly-faq.html. Its real power is its integration with Adobe Express, where you can generate an image and then immediately add your own text and branding professionally.
| Pros | Cons |
| Designed to be commercially safe (ethically trained). | Completely fails at generating text within an image. |
| Excellent for clean, professional photorealism. | Can be too safe; results are sometimes less creative. |
| Great integration with Adobe Express and other apps. | Free plan is based on “credits” that can run out. |
| Strong controls for content type (Art vs. Photo). |
5. Canva Magic Media
This is the tool millions of bloggers already have at their fingertips. It’s built right into the Canva design interface, making it the most convenient option by far. It’s powered by a version of Stable Diffusion.
The Results:
- Prompt 1 (Desk Photo): Just okay. The quality was noticeably lower than Designer or Firefly. The image was a bit fuzzy, the lighting was flat, and elements were sometimes “off” (like a warped-looking pen). It’s usable in a pinch, but not for a main hero image.
- Prompt 2 (Email Illustration): Pretty good. Canva has built-in style pickers (like “Minimalist,” “Watercolor”), which helped guide the tool. The results were clean and simple, perfectly fine for an in-post illustration.
- Prompt 3 (Text Robot): A garbled mess. Like Leonardo and Firefly, the text was completely illegible. This isn’t what it’s for.
- Prompt 4 (Fox on Moon): It did it, but the quality was lacking. The image was less detailed, the colors were muddy, and it just looked more “fake” than the others.
My Take:
Here’s the thing about Magic Media: it’s fast. I’m already in Canva making a Pinterest pin or a blog banner. I can type a prompt and get a “good enough” background or a small icon in 10 seconds without switching tabs. I would never use it to generate my main featured image. The quality just isn’t there. The best workflow is to generate a high-quality image in Designer or Firefly and upload it to Canva for final edits.
| Pros | Cons |
| Extremely convenient; already inside your design tool. | Lowest image quality of the group. |
| Simple style-picker buttons make it easy to use. | Very poor prompt-following for complex ideas. |
| Good for creating simple backgrounds or icons quickly. | Cannot generate text at all. |
| Part of the free Canva plan. |
The Final Verdict: Side-by-Side Showdown
After all this testing, it’s clear there is no single “best” free AI image generator. The “best” one is the right tool for the right job.
Best for Photorealism & Complex Ideas
Winner: Microsoft Designer (DALL-E 3)
Its ability to understand long, detailed prompts is unmatched. If you want a specific scene and you want it to look real, this is your tool.
Best for Artistic Styles & Unique “Vibes”
Winner: Leonardo.Ai
If you want your blog to have a distinct artistic style (like “dark academia” or “dreamy watercolor”), Leonardo’s community models give you the most creative control.
Best for Text-in-Image Graphics (Title Cards, Quotes)
Winner: Ideogram
It’s not even a contest. Ideogram is the only tool on this list I trust to get text right. This is a huge time-saver for creating branded social media or blog title graphics.
Best for Commercial Safety & Corporate Blogs
Winner: Adobe Firefly
For any blogger who is (rightfully) concerned about copyright and commercial use, Firefly is the only choice. Its “safe” training data gives you peace of mind, and the quality is polished and professional.
Best for All-in-One Convenience
Winner: Canva Magic Media
It’s the weakest in quality, but it’s the fastest. For a small background texture or a simple icon you need right now, it’s good enough and saves you from breaking your workflow.
My Personal Workflow for Blog Graphics
In practice, I don’t use just one tool. I’ve developed a workflow that combines their strengths.
- Step 1: The Hero Image. I start in Microsoft Designer for my main featured image. I write a detailed prompt to get the exact concept and photorealistic quality I need.
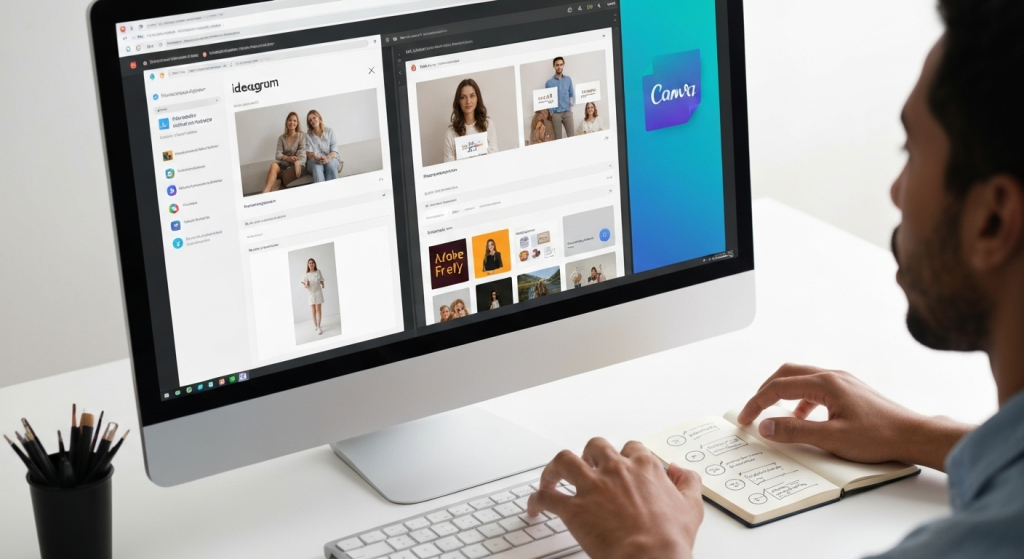
- Step 2: The Text Problem. If the image needs a text overlay (like the blog post title), I have two choices. If I want the text inside the image (e.g., on a sign), I go to Ideogram. If I just want to add text on top of the image, I download my graphic from Designer and upload it to Canva.
- Step 3: In-Post Illustrations. For simple vector graphics, Adobe Firefly‘s “Vector” setting is incredibly clean and professional.
- Step 4: The “Safety Check.” If I’m writing for a major client or on a sensitive topic, I skip the others and use Adobe Firefly for all my images. The commercial safety is non-negotiable in that case.
This multi-tool approach gives me the quality of Designer, the text power of Ideogram, the safety of Firefly, and the editing ease of Canva.
Tips for Writing Better AI Prompts
The tool is only half the equation. Your prompt is the other half. After hundreds of generations, I’ve learned a few tricks.
- Be Specific, Not Vague. Don’t just say “a dog.” Say “A happy, panting golden retriever puppy, sitting in a field of green grass, close-up shot.”
- Include Style Keywords. This is the most important part. Always start or end your prompt with a style.
- Examples: “photorealistic,” “minimalist vector illustration,” “watercolor painting,” “3D render,” “studio lighting,” “cinematic.”
- Set the Scene. Describe the environment.
- Examples: “soft natural lighting,” “dark moody background,” “on a wooden table,” “isolated on a white background.”
- Iterate. Iterate. Iterate. Your first prompt is almost never your best. See what the AI gives you, then add to your prompt. If the dog is “floating,” add “sitting on the grass.” If the lighting is too dark, add “bright, sunny day.” This is how you “direct” the AI.
FAQs: Your Questions Answered
Are these AI images really free to use on my blog?
Mostly, yes, but you must read the terms of service for each tool. Most (like Microsoft Designer and Canva) have very permissive terms for free use. Adobe Firefly is explicitly designed for commercial use. The biggest legal gray area is copyright. You can’t copyright an AI-generated image as your own, but you are generally free to use it.
Will Google penalize my blog for using AI images?
No. Google does not penalize content for using AI images. Google cares about the quality and relevance of the image. A high-quality, relevant AI image that illustrates your point is far better for SEO than a generic, irrelevant stock photo.
How do I avoid all my images looking “fake” or “AI-generated”?
Focus on your prompts. The “fake” look often comes from vague prompts. By being specific about “photorealism,” “soft lighting,” and “detailed textures,” you can push the AI to create much more believable images. Also, avoid common AI weak spots, like hands (which are getting better) and complex text (unless using Ideogram).
Which tool is fastest for a blogger in a hurry?
For pure speed from idea to “in the post,” Canva Magic Media wins, simply because it’s already in Canva. For the best quality generated quickly, Microsoft Designer is the winner.
My Final Thoughts
After this deep dive, my main takeaway is this: the perfect single free AI image generator for bloggers doesn’t exist. But a perfect workflow does.
Stop looking for one tool to rule them all. Instead, build a small, free toolkit.
- Use Microsoft Designer for your heavy lifting and complex, high-quality images.
- Use Ideogram any time your graphic involves text.
- Use Adobe Firefly when commercial safety and a professional, clean look are your top priority.
- Use Canva Magic Media for quick, “good enough” icons and backgrounds when you’re already in your design flow.
AI image generation is no longer a gimmick. It’s a powerful, practical, and free way for bloggers and small creators to finally make their visual content as unique and compelling as their writing. The real skill is moving from just “prompting” to “directing.” So, open a few tabs and start experimenting.
